Getting Connected to Falco
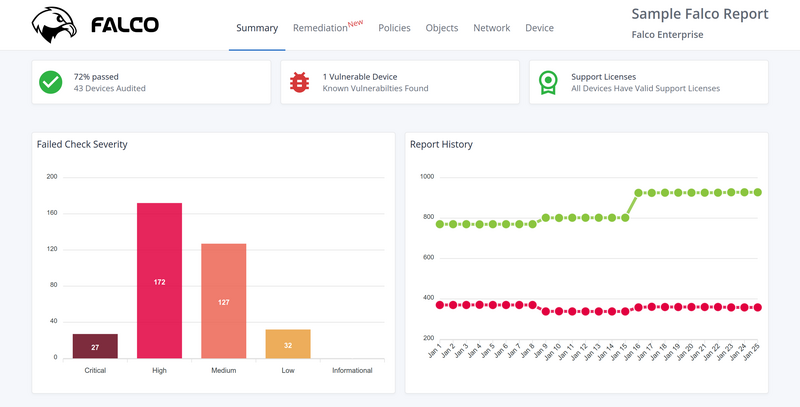
Published February 17, 2021 | Updated March 23, 2023Overview
There are three steps to get devices ready to be scanned by Falco:
- Add a service account for Falco to use
- Allow Falco to remotely access the device(s) API
- Reach out to Digital Scepter to schedule a kickoff call
Connecting Multiple Devices
If you have multiple devices to connect, you will need to repeat the configuration for each device. For Panorama managed devices, only a single connection and service account are required. Falco will automatically scan all devices connected to the Panorama.
A Note about Security
Falco uses the PAN API to retrieve device configuration information in real time. The API connection is standard HTTPS that we restrict to either TLS 1.3 or TLS 1.2 with a strong cipher suite that meets and exceeds NIST SP 800-52 Rev. 2 [PDF], the primary standard used by the US Federal Government, PCI-DSS and HIPAA.
We encourage customers to use a certificate signed by a publicly trusted certificate authority (CA) to secure the API connection, but also recognize that most organizations will want to use a self-signed certificate for what is typically an internal-only facing resource.
For self-signed certificates, Falco uses a trust on first use (TOFU) model to verify the identity of the remote device similar to most SSH clients. In order to prevent man-in-the-middle attacks, Falco will remember the first certificate it sees and refuse to connect if future connections present an unknown certificate. Changes to the device certificate will require manual intervention by Digital Scepter staff to allow Falco to reconnect.
With appropriate customer-side controls in place we believe that connections to the API over the public internet are very secure and present little to no risk to customers.
1. Create the Falco Service Account
Both Panorama and individual firewalls require a service account to be created. These steps are the same for both.
- Go to
Device > Administrators(Panorama > Administratorsif on a Panorama) and click Add at the bottom of the page to add a new local admin - Give the new account a name (we prefer
falco, but it’s not critical that you use the same name) - Generate a secure password and enter it in the password fields. Keep this password as you will need to send it along with the username to Digital Scepter in the final step
- Ensure the
Administrator Typefield is set toDynamicand the role is set toSuperuser (read-only)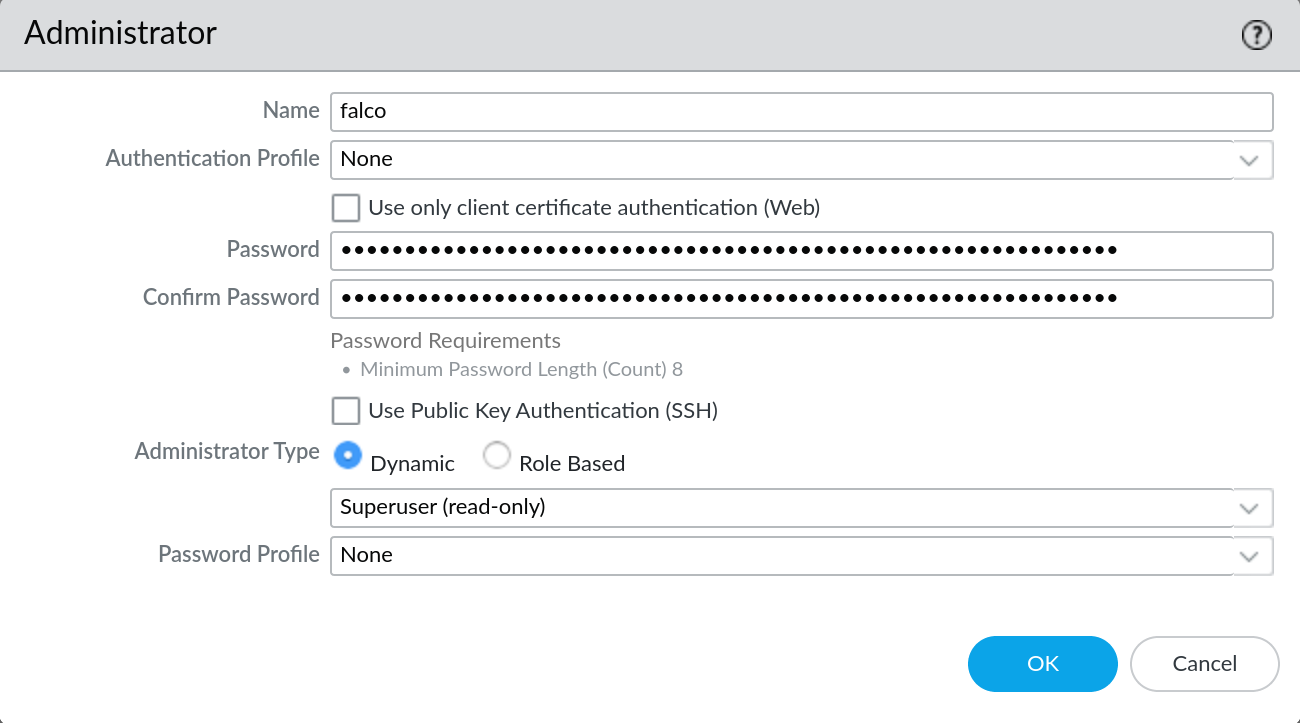
- Click OK and then commit the configuration changes
2. Allow Remote API Connections
In order for Falco to query the device configuration, it needs to be able to remote access the devices API. The API can be enabled on either the management interface or a dataplane interface, whichever is more convenient for your environment.
If you can access your devices web interface from the public internet, you are ready for Falco to start scanning your devices. You can skip to section 3.
For Edge Firewalls
For devices connected directly to the public internet, we recommend that you create an Interface Management profile and attach it to one of your external facing interfaces. Here is an outline of how to accomplish this:
- Go to
Network > Profiles > Interface Mgmtand either add a new profile or reuse an existing external management profile - On the Interface Management Profile, ensure that HTTPS is enabled, add
199.255.27.64/27(our datacenter IP range) to thePermitted IP Addressespane on the right, then click OK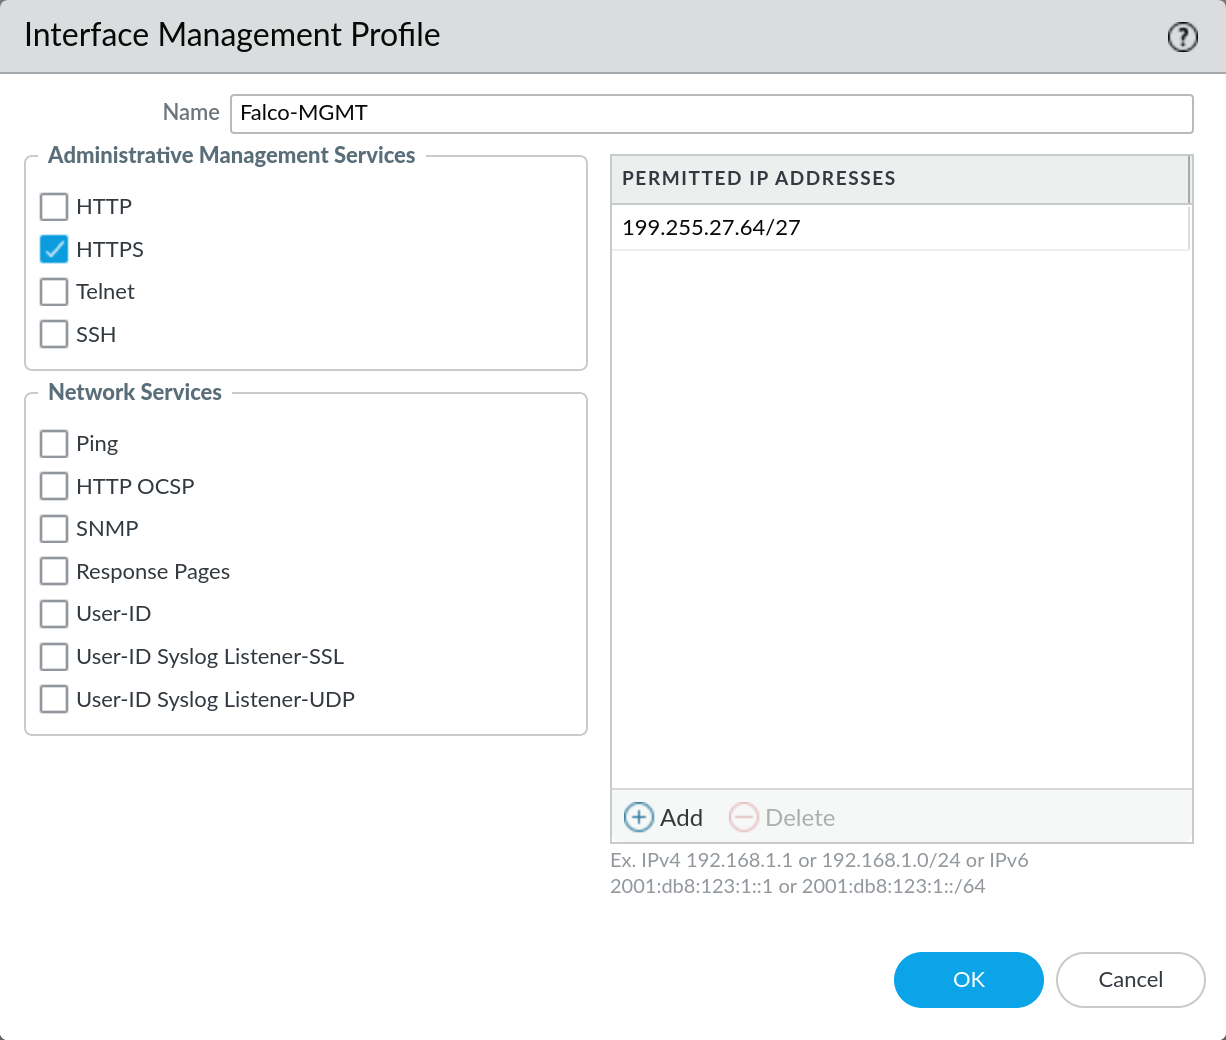
- Go to
Network > Interfacesand edit the external interface with the external IP Falco will connect to - In the interface, select the management profile under
Advanced > Other Info > Management Profile, then click OK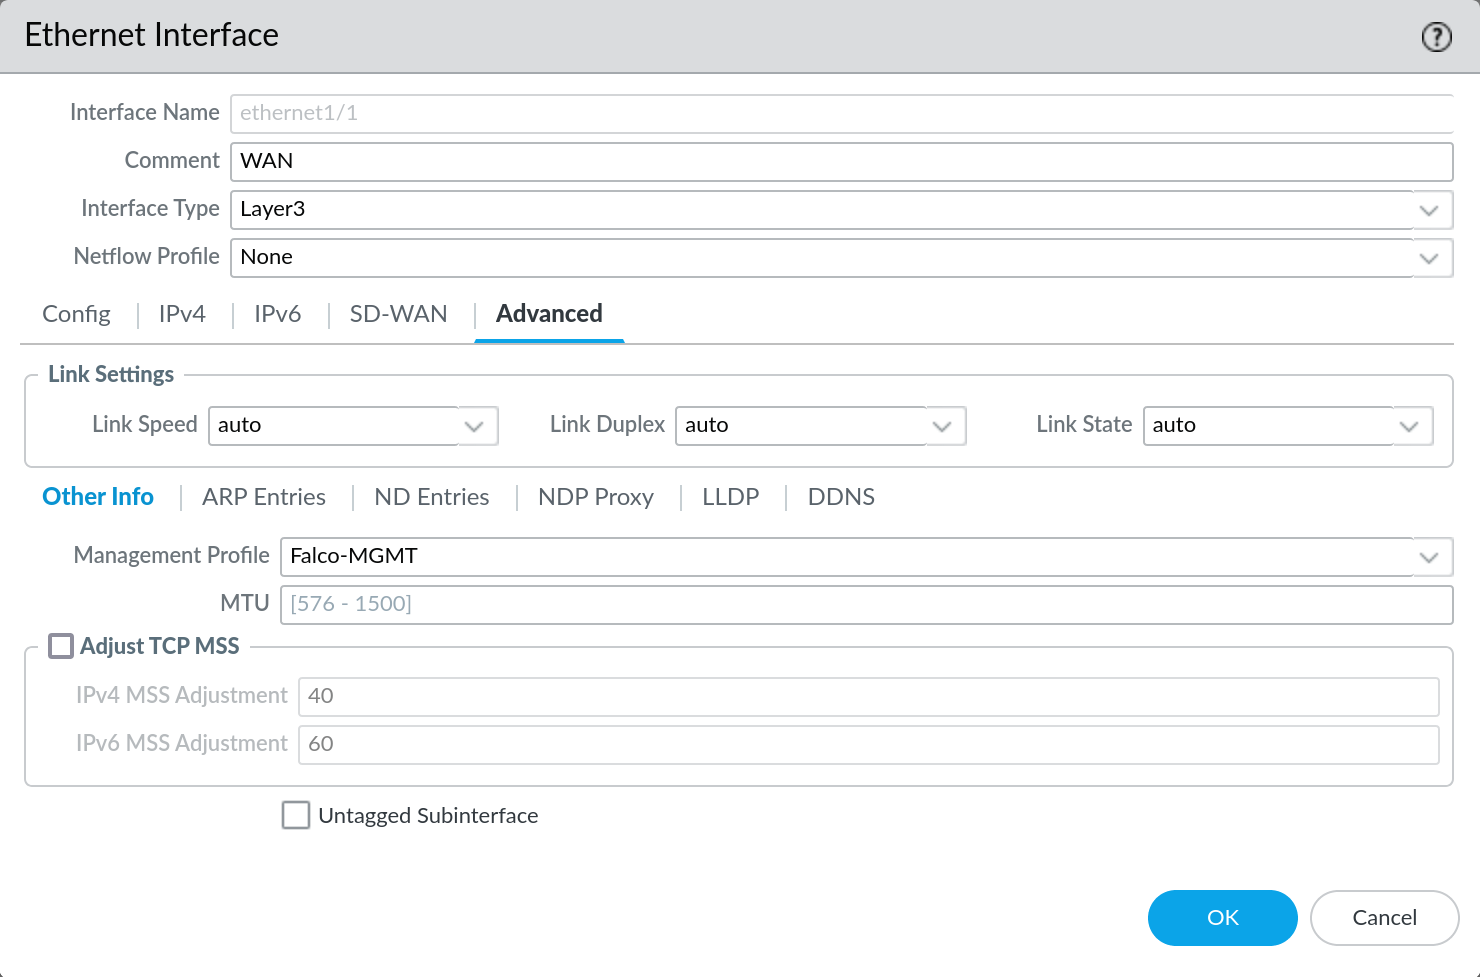
- Commit the configuration changes
Note that you may need additional security policies to allow this traffic depending on how your rulebase is configured.
For Internal Firewalls or Panoramas

For devices that are not directly connected to the public internet, we recommend that you create a Destination Network Address Translation (DNAT) rule to forward connections headed to your external IP to the internal IP of your firewall/Panorama. Here’s a general outline of how to accomplish this:
- On your edge firewall, create a DNAT policy that translates the destination IP on incoming connections from the external IP to the internal IP of your device.
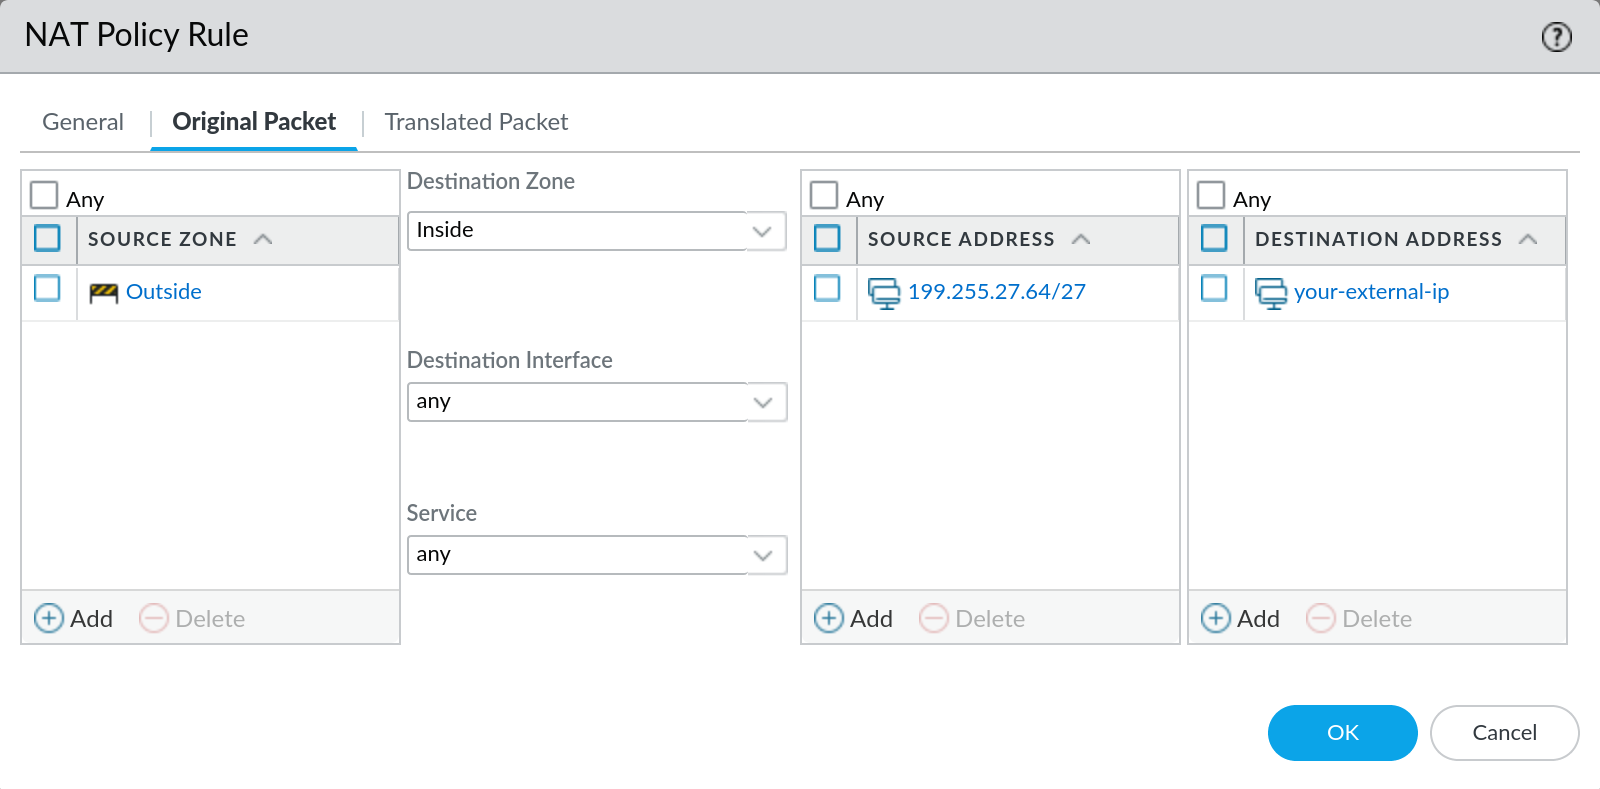

- Create a corresponding security rule that allows
sslfrom199.255.27.64/27(our datacenter IP range) to the external IP you’ve chosen. Since this rule allows NAT’d traffic be sure to use the pre-NAT destination IP address and the post-NAT destination zone.
- Commit the configuration changes
3. Reach out for a Kickoff Call
Once you have completed the steps above, email [email protected] to schedule a kickoff call. During the call we will connect your devices to Falco and generate your first report.
Don’t forget to gather a list of email addresses that we should send the Falco reports to. Distribution lists are also supported. Additionally, you may specify specific email addresses to receive reports for specific devices if you prefer.
Getting Help
If you have any questions or need help with this process, please reach out to us at [email protected] and we will be happy to assist you.