Summary
On November 7th, 2023 Palo Alto Networks announced that there are two upcoming certificate expirations that may cause disruptions for customers. Despite both issues involving certificates, they are unrelated and require different actions to resolve.
The first issue affects basically all devices and is easy to remediate. The second issue affects only customers with Data Redistribution configured and involves a more complicated remediation process. This post will describe both issues and how to resolve them.
Issue #1: Content Update Certificate Expiration
Description
Internally, PAN devices verify the authenticity of content updates by checking the signature of the update against a certificate. This certificate is set to expire on December 31th, 2023. If the certificate expires, content updates will fail to install. This will cause the device to stop receiving new signatures for threats, applications, and other content. This will not affect the ability of the device to pass traffic, but it will cause the device to be unable to detect new threats and applications.
Affected Devices
Any devices that retrieve content updates from Palo Alto Networks, including Panoramas.
Resolution
There are three remediation paths for this issue:
- Install content update version 8776-8390 or later on all your devices
- Upgrade the PAN-OS version on all your devices to a patched version of PAN-OS
- Install a Device Certificate on your devices (not recommended)
We recommend that customers choose option #1 and install content update 8776-8390 as this is the easiest and most straightforward option. This content update is available now and can be installed on any PAN-OS version. For customers with many firewalls we recommend using Panorama to push the content update to all devices if they are not already configured to automatically install the latest content updates.
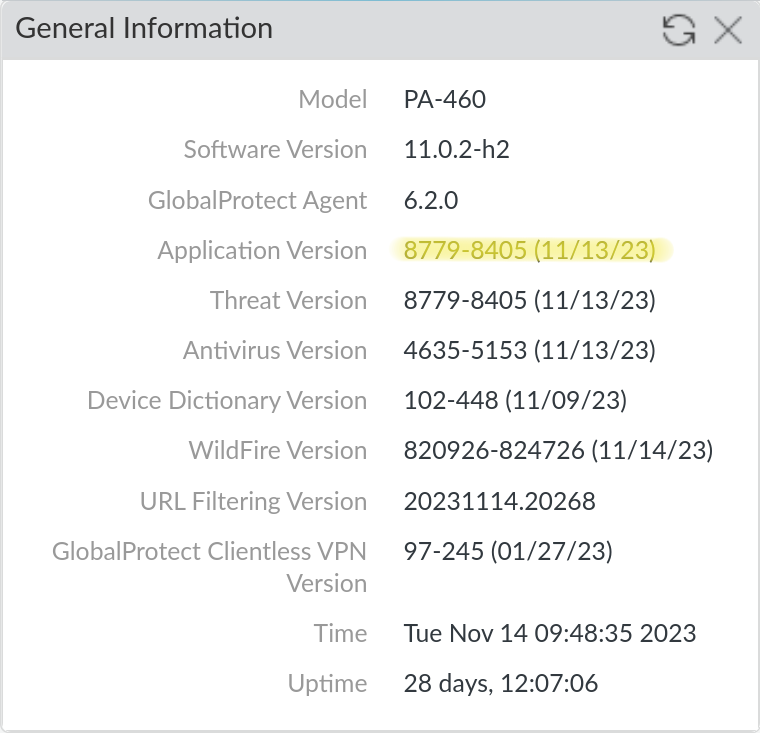
To verify that you have the correct content update installed, you can check the Application Version on Dashboard > General Information.
Issue #2: Default Data Redistribution Certificate Expiration
Description
Data Redistribution is the umbrella term for the mechanism by which PAN devices can share user information with each other. Data Redistribution includes User-ID, IP-tags, User-tags, GlobalProtect HIP results and quarantine list entries. By default, the device to device communication uses a predefined certificate to secure these communications. This certificate is set to expire on December 31th, 2023. If the certificate expires, devices will be unable to share user information with each other, which could lead to an outage if that information is required for security policy enforcement.
Affected Devices
Any device that acts as a client or server for Data Redistribution, including Panoramas.
Resolution
There are two remediation paths for this issue:
- Upgrade the PAN-OS version on all your devices to a patched version of PAN-OS (recommended)
- Use custom certificates to secure the Data Redistribution communication (not recommended for customers using Panorama)
We strongly recommend that customers upgrade rather than attempt to configure custom certificates, especially for customers using Panorama. The custom certificate configuration is complex and does not scale well (see the For Panorama Customers section below for more details), in addition to making firewall onboarding more difficult. Additionally, the custom certificate configuration appears to apply to the User-ID agents as well, which means that you would need to install the same custom certificates on all your User-ID agents as well. This is not documented anywhere, but was confirmed experimentally in our lab environment.
With that caveat, below are the steps to configure custom certificates for Data Redistribution. PAN also publishes a guide to configuring custom certificates, though it is geared towards securing device to Panorama communication.
Client vs. Server
Note: This guide shows the steps for both the client and server side of the communication as devices are typically both at once. If you know a device will only be a client or server you can skip the steps for the other role. Each section is labeled with the role it applies to.
For Panorama Customers
We don’t recommend that customers use custom certificates to secure Data Redistribution if they are using Panorama. This is because if you enable custom certificates on Panorama there is no option to enable it only for data redistribution. This means that you’ll have to use the custom certs for communication with Panorama, which could cause an outage if you have not installed the new certificates on all your devices. If you are using Panorama we recommend that you upgrade all your devices to a patched version of PAN-OS instead.
Additionally, you can not push the configuration option to enable custom certs for the Panorama configuration from a Panorama template. This means that you’d have to create a local override on each Panorama managed firewall in order to deal with the fact that custom certs on Panorama for Data Redistribution force custom certs for the Panorama management connection. Since this solution doesn’t scale well we recommend that you upgrade all your devices to a patched version of PAN-OS instead.
Note: On a Panorama everything that would be on the Device tab is on the Panorama tab instead.
Prerequisites
- The public key to a CA certificate that you will use to validate the certificates of other devices. This certificate must be in PEM or PKCS12 format.
- The private key to a certificate signed by the above CA that you will use to encrypt communications between devices. This certificate must be in PEM or PKCS12 format.
We recommend that customers use their existing PKI (typically Active Directory Certificate Services) to manage all their internal certificates, however you could generate both of these certificates on a PAN device if you do not have a PKI in place already.
1: Import the certificates (Client & Server)
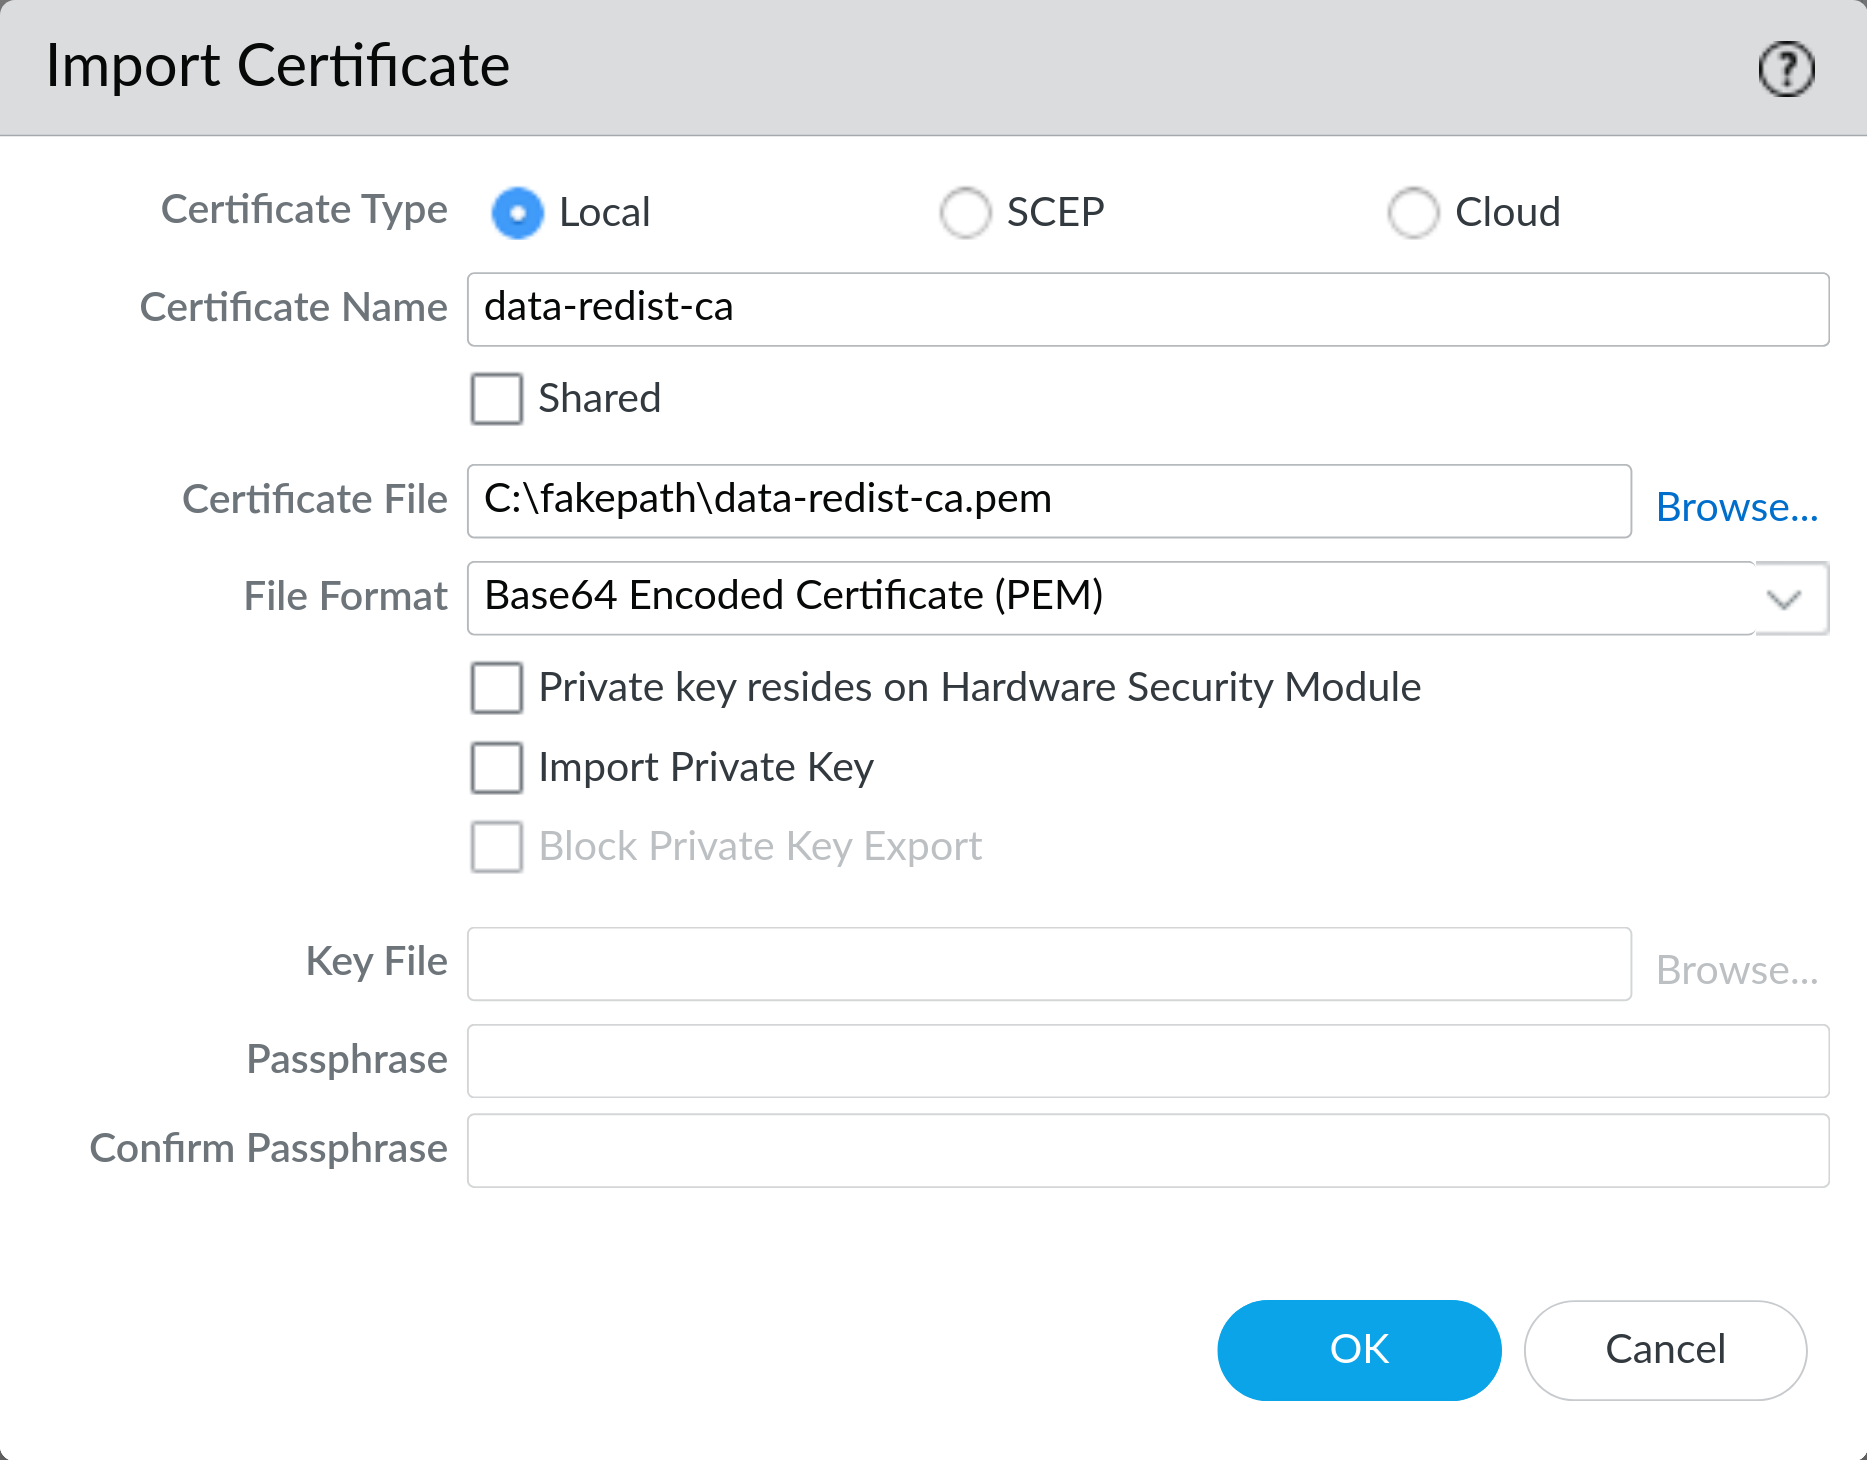
On Device > Certificate Management > Certificates click Import and import the CA certificate. If you do not have an existing CA certificate you can generate one on the device here. Make sure to export this CA certificate and install it on all your devices so they can validate each other’s certificates.
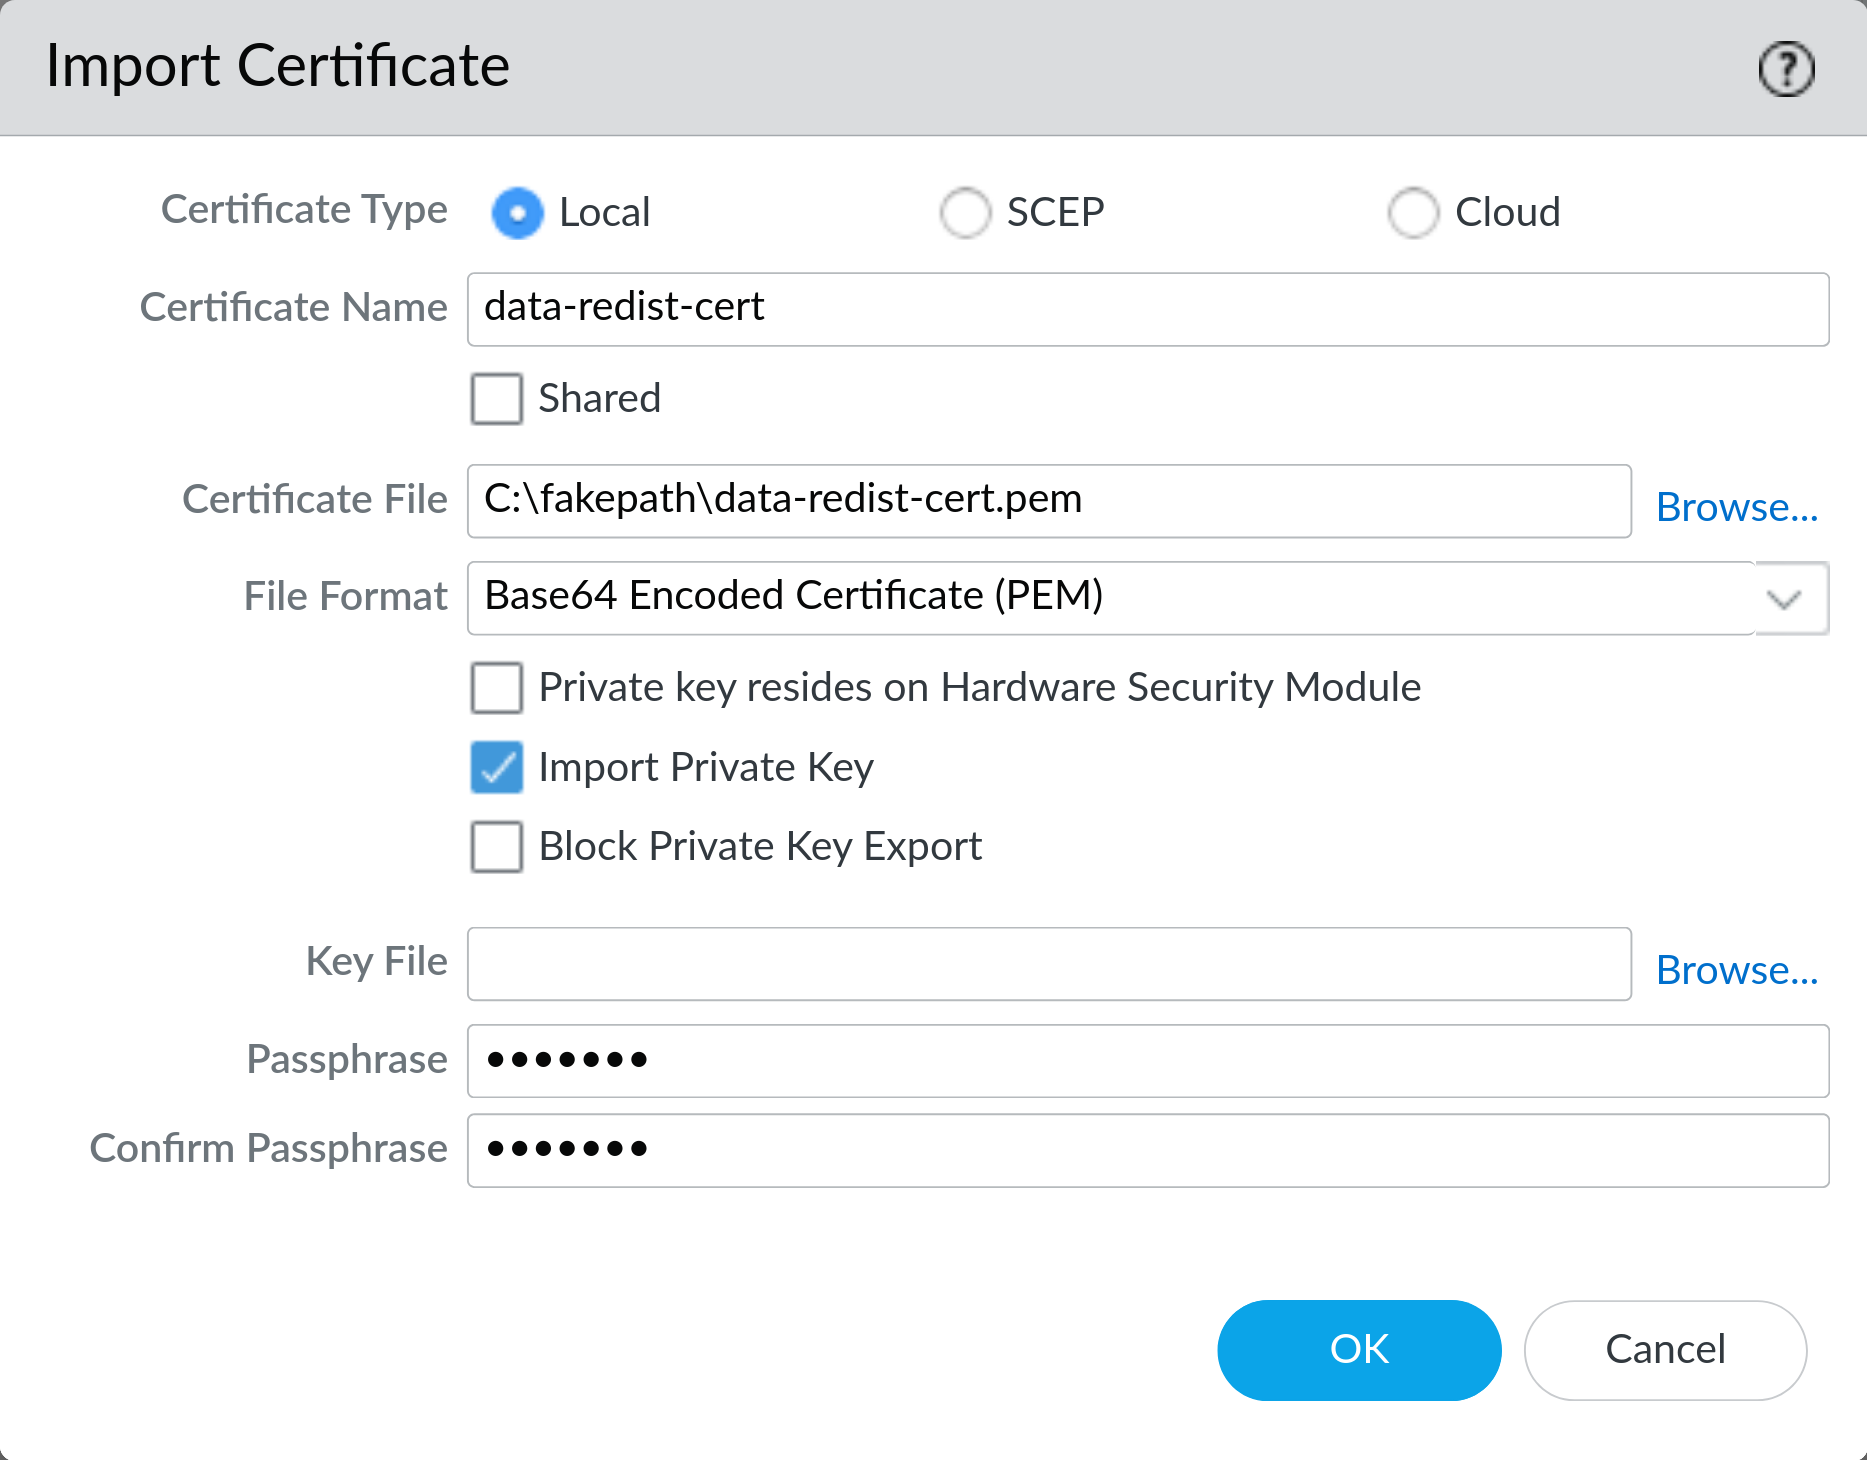
On Device > Certificate Management > Certificates click Import and import the certificate with the private key. If you’re using PEM formatted cert be sure to check Import Private Key. If the certificate is password protected you will need to enter the password here.
Note: if the cert is not password protected you will still need to provide a password here, but it will not be used.
If you do not have an existing certificate you can generate one signed by the CA you created earlier on the device here. Make sure to export this certificate and install it on all your devices so they can encrypt communications with each other.
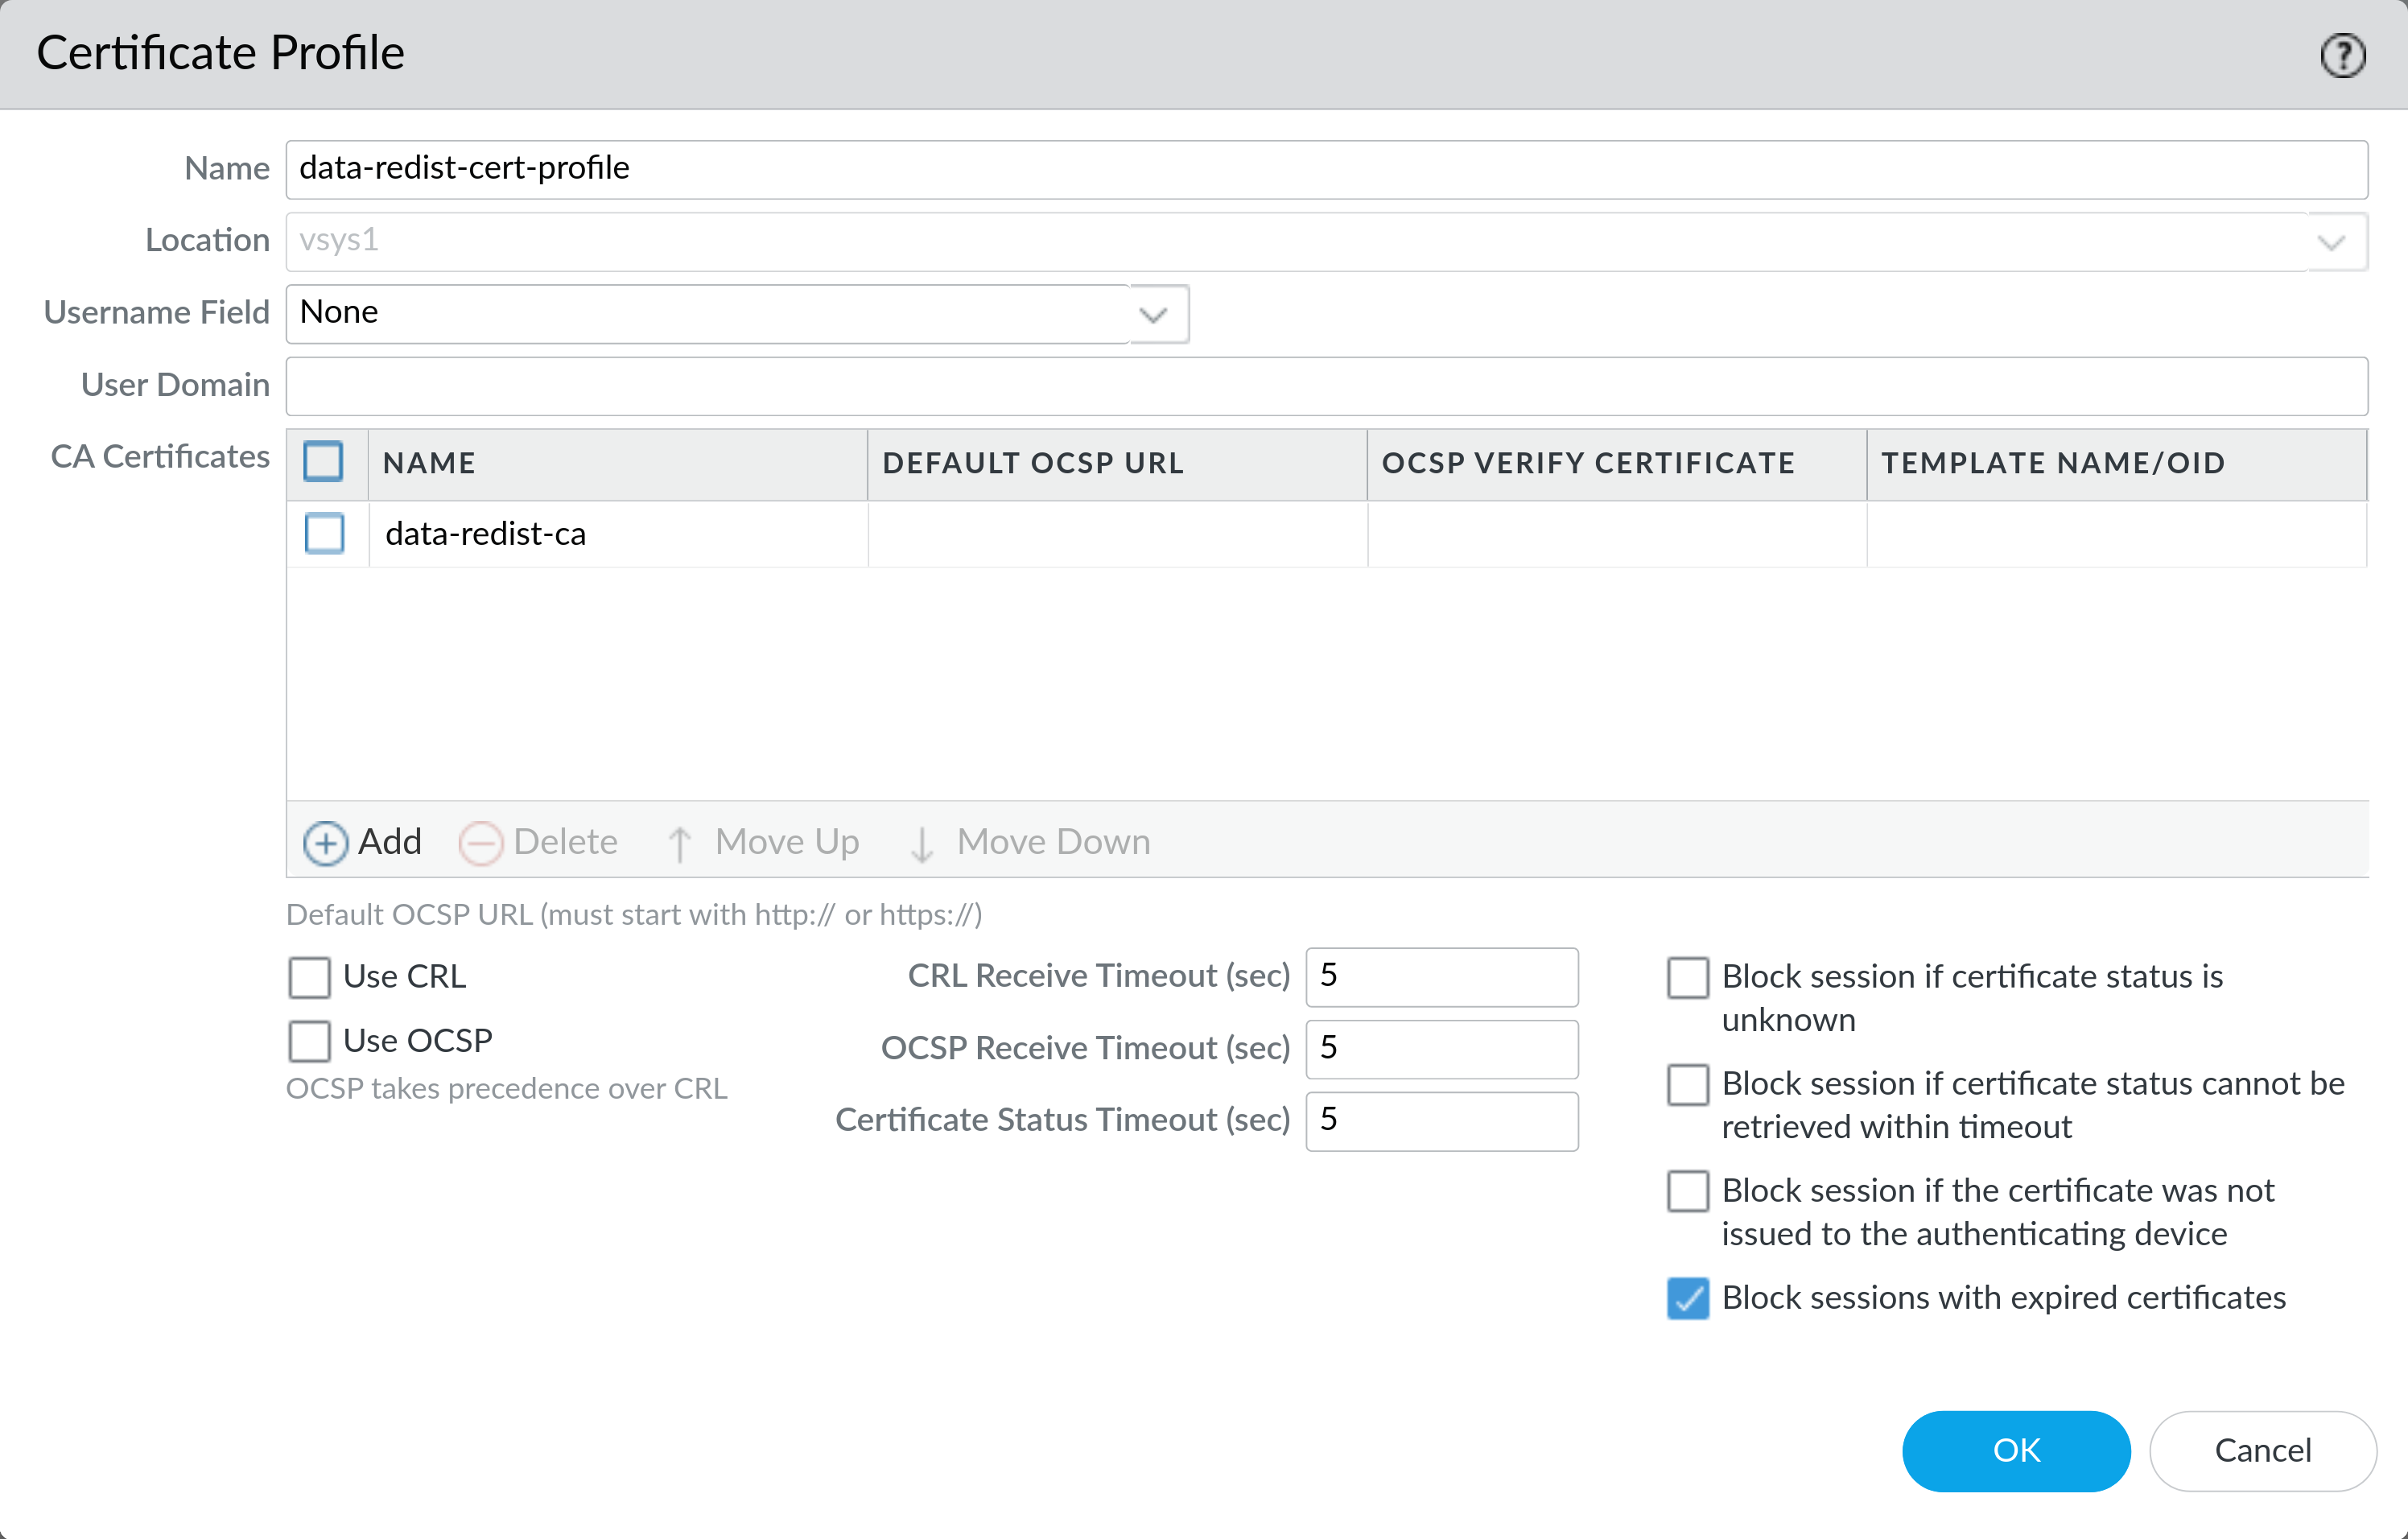
On Device > Certificate Management > Certificate Profile click Add and create a new profile. Give it a name and select the CA certificate you imported earlier.
Enable Block sessions with expired Certificates Click OK to save the profile.
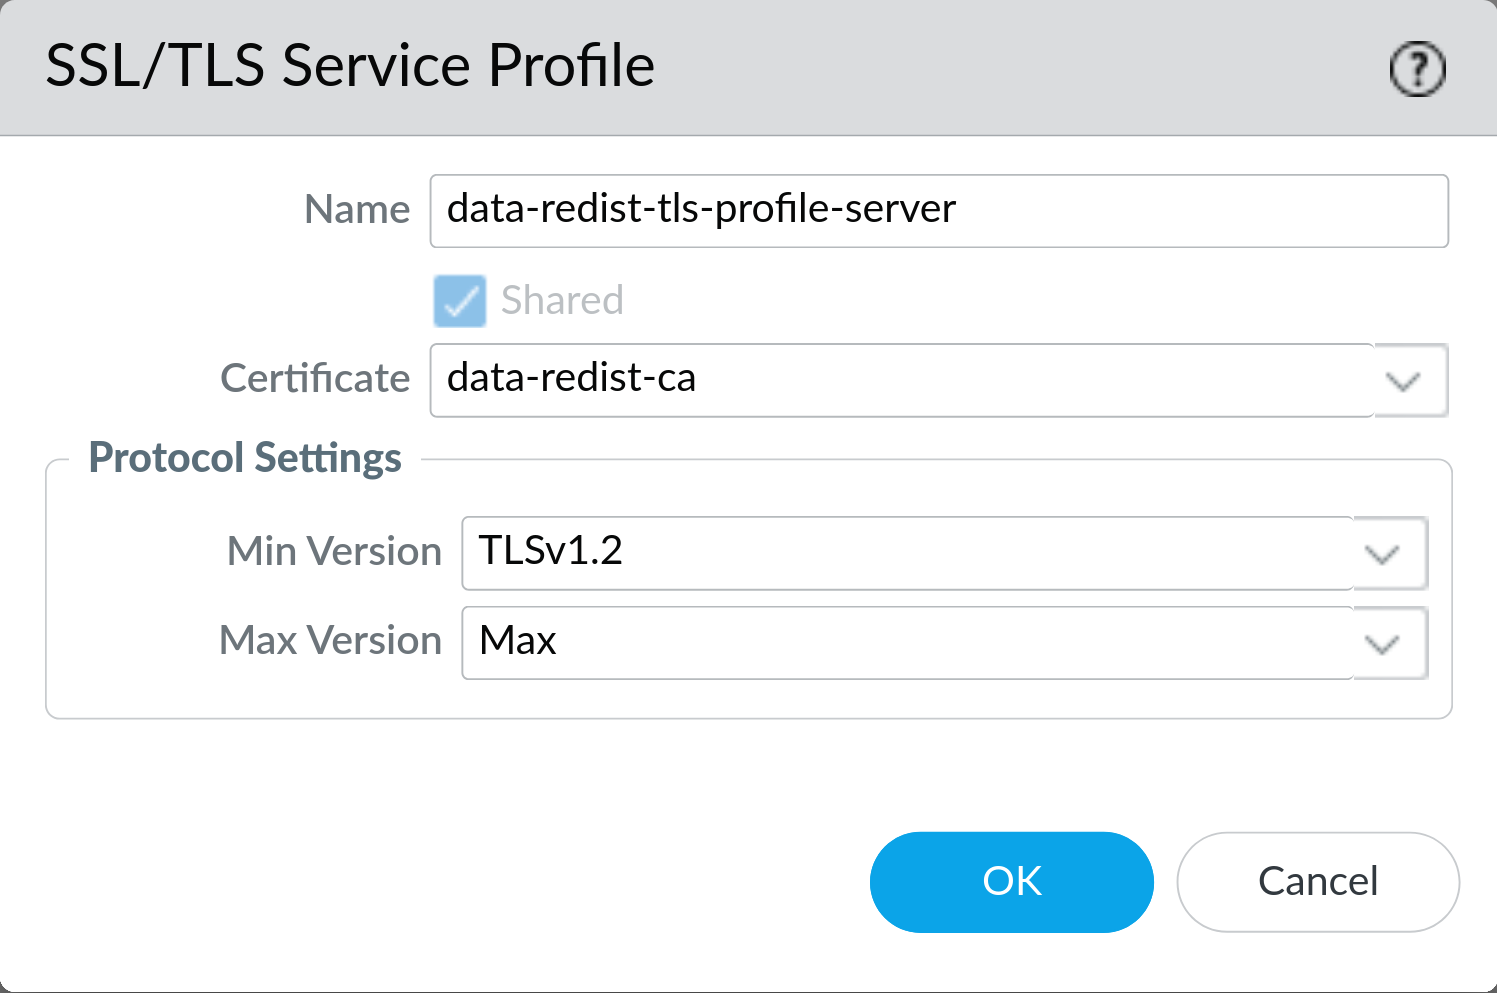
On Device > Certificate Management > SSL/TLS Service Profile click Add and create a new profile. Give it a name and select the certificate with the private key you imported earlier.
Set the Min Version to TLSv1.2 and leave the Max Version set to Max. Click OK to save the profile.
4: Enable Secure Data Redistribution (Client)
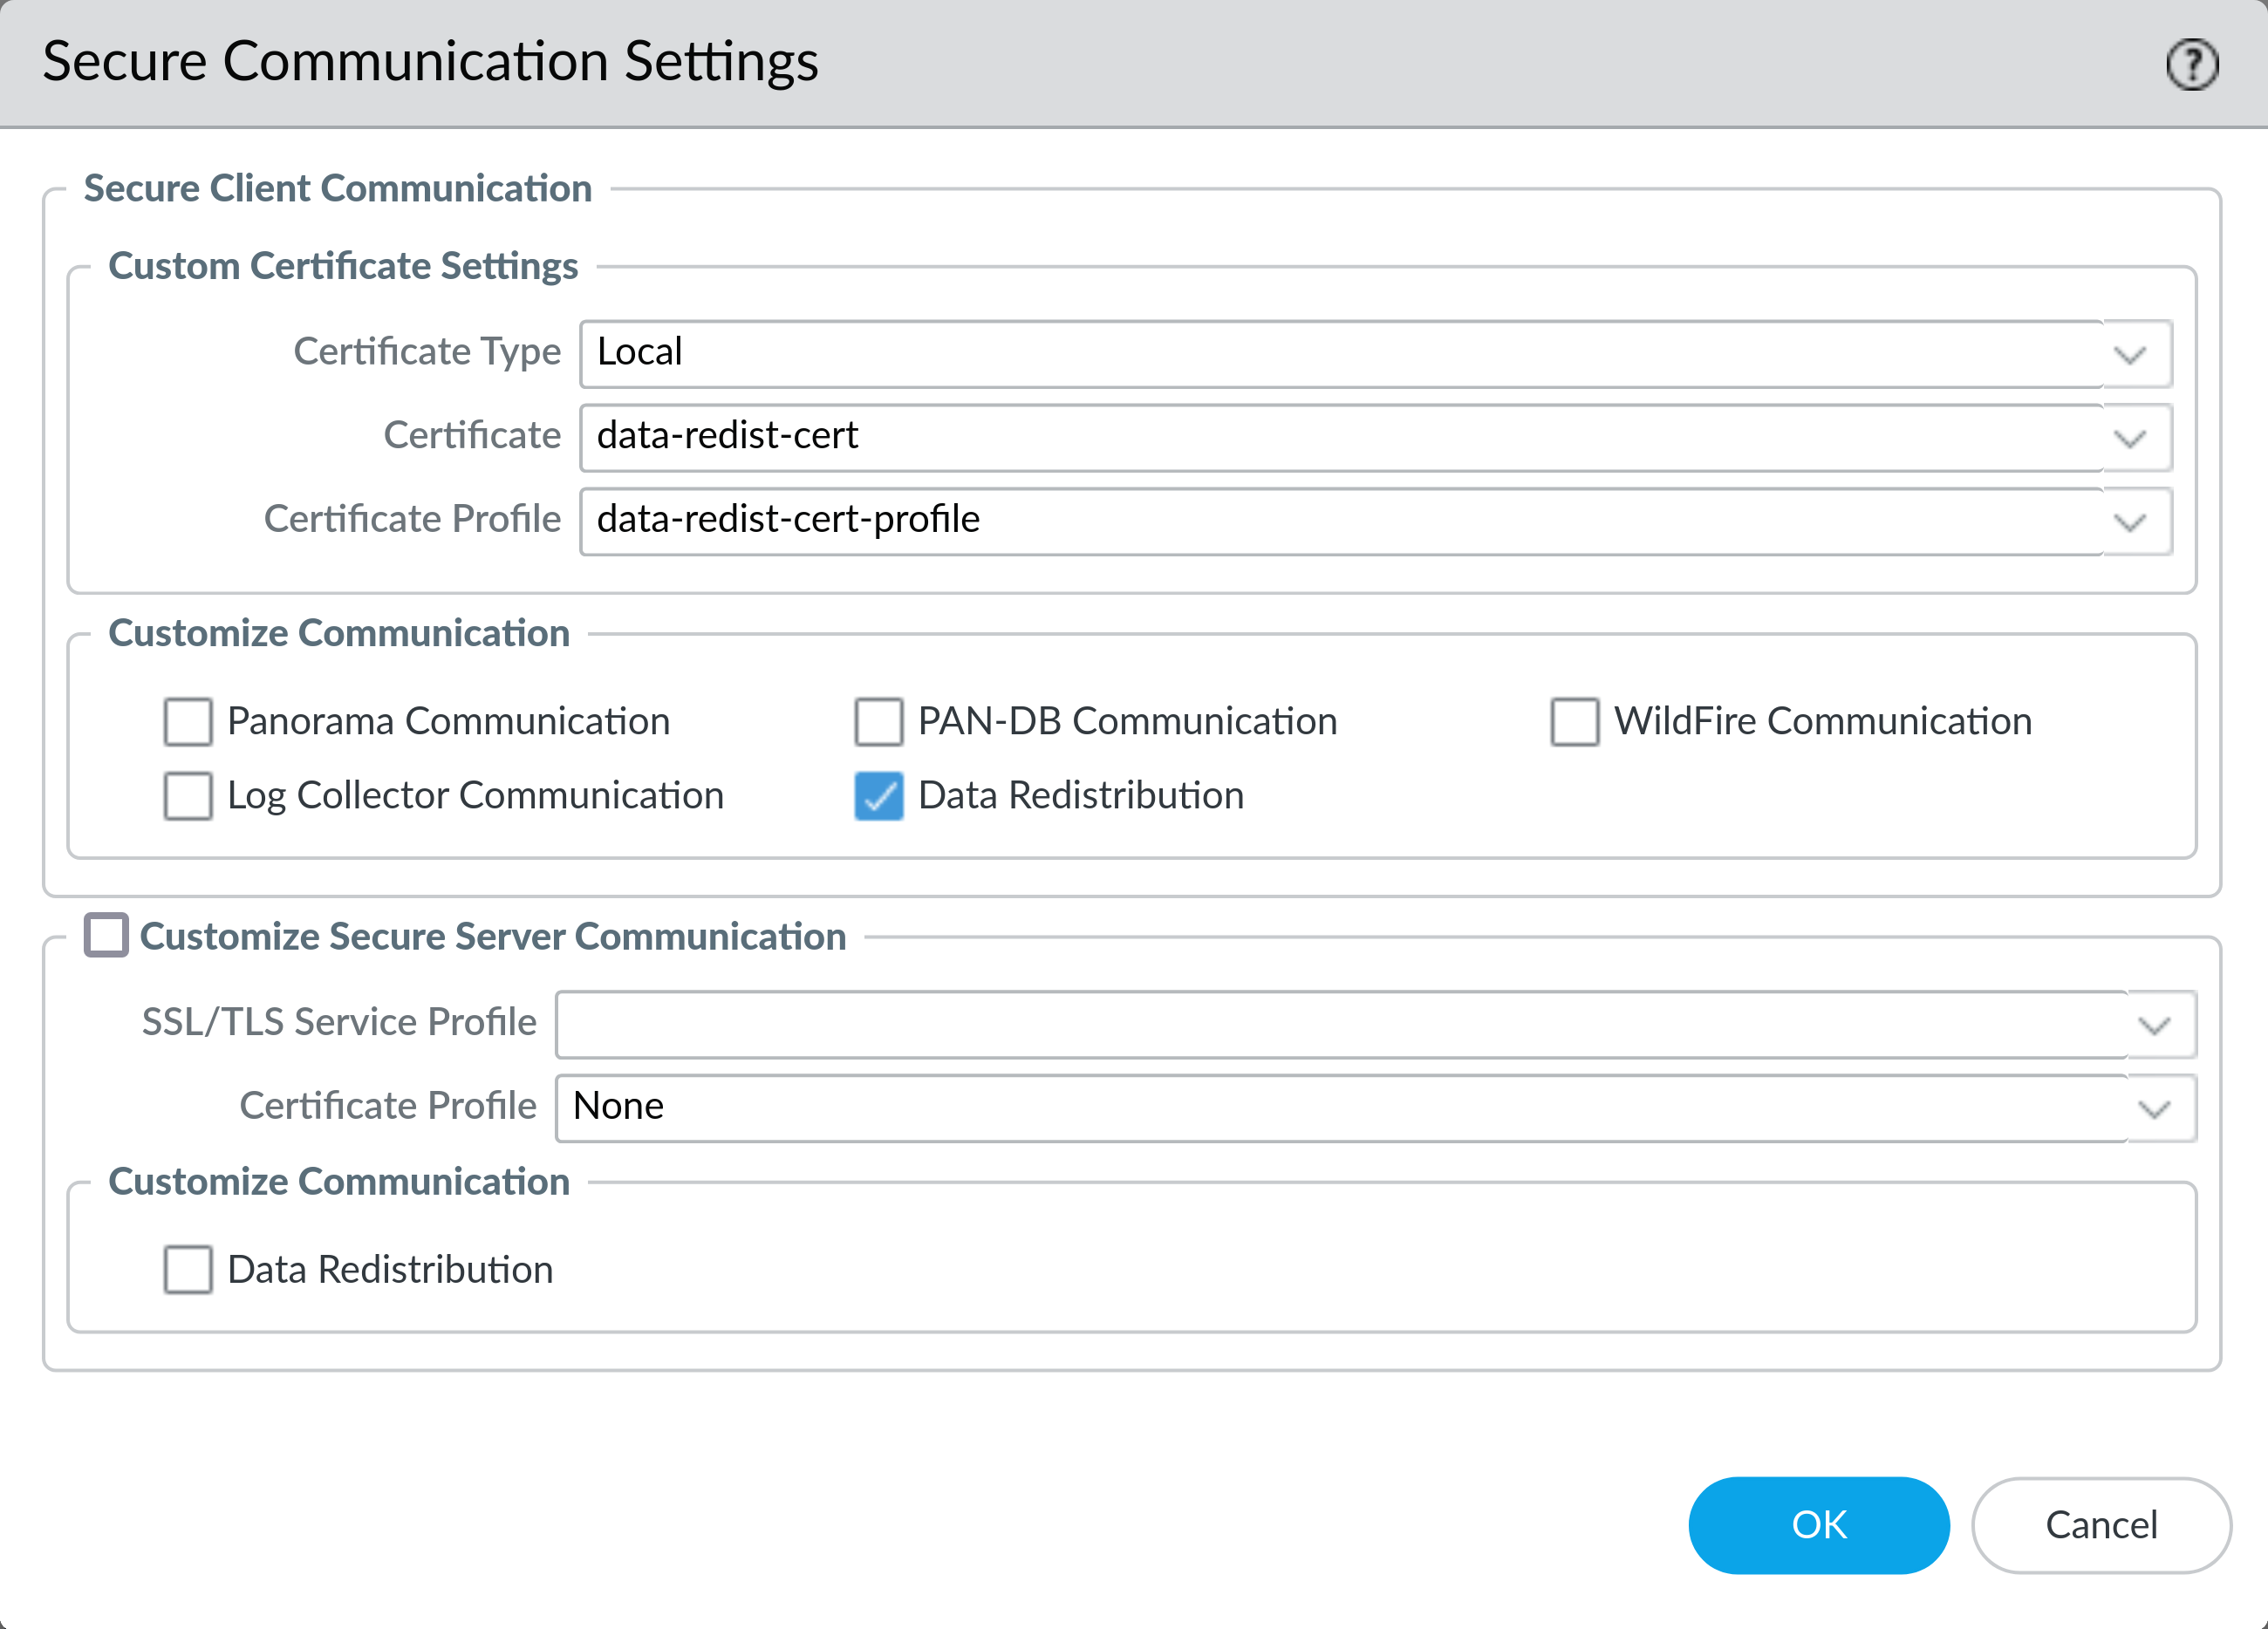
On Device > Setup > Management click the gear icon at the top right of the Secure Communication Settings section. Under Secure Client Communications > Custom Certificate Settings > Certificate Type select Local from the dropdown.
Then select the certificate with the private key you imported earlier from the Certificate dropdown. Select the certificate profile you created earlier from the Certificate Profile dropdown. Check the box for Data Redistribution and click OK to save the settings.
5: Enable Secure Data Redistribution (Server)
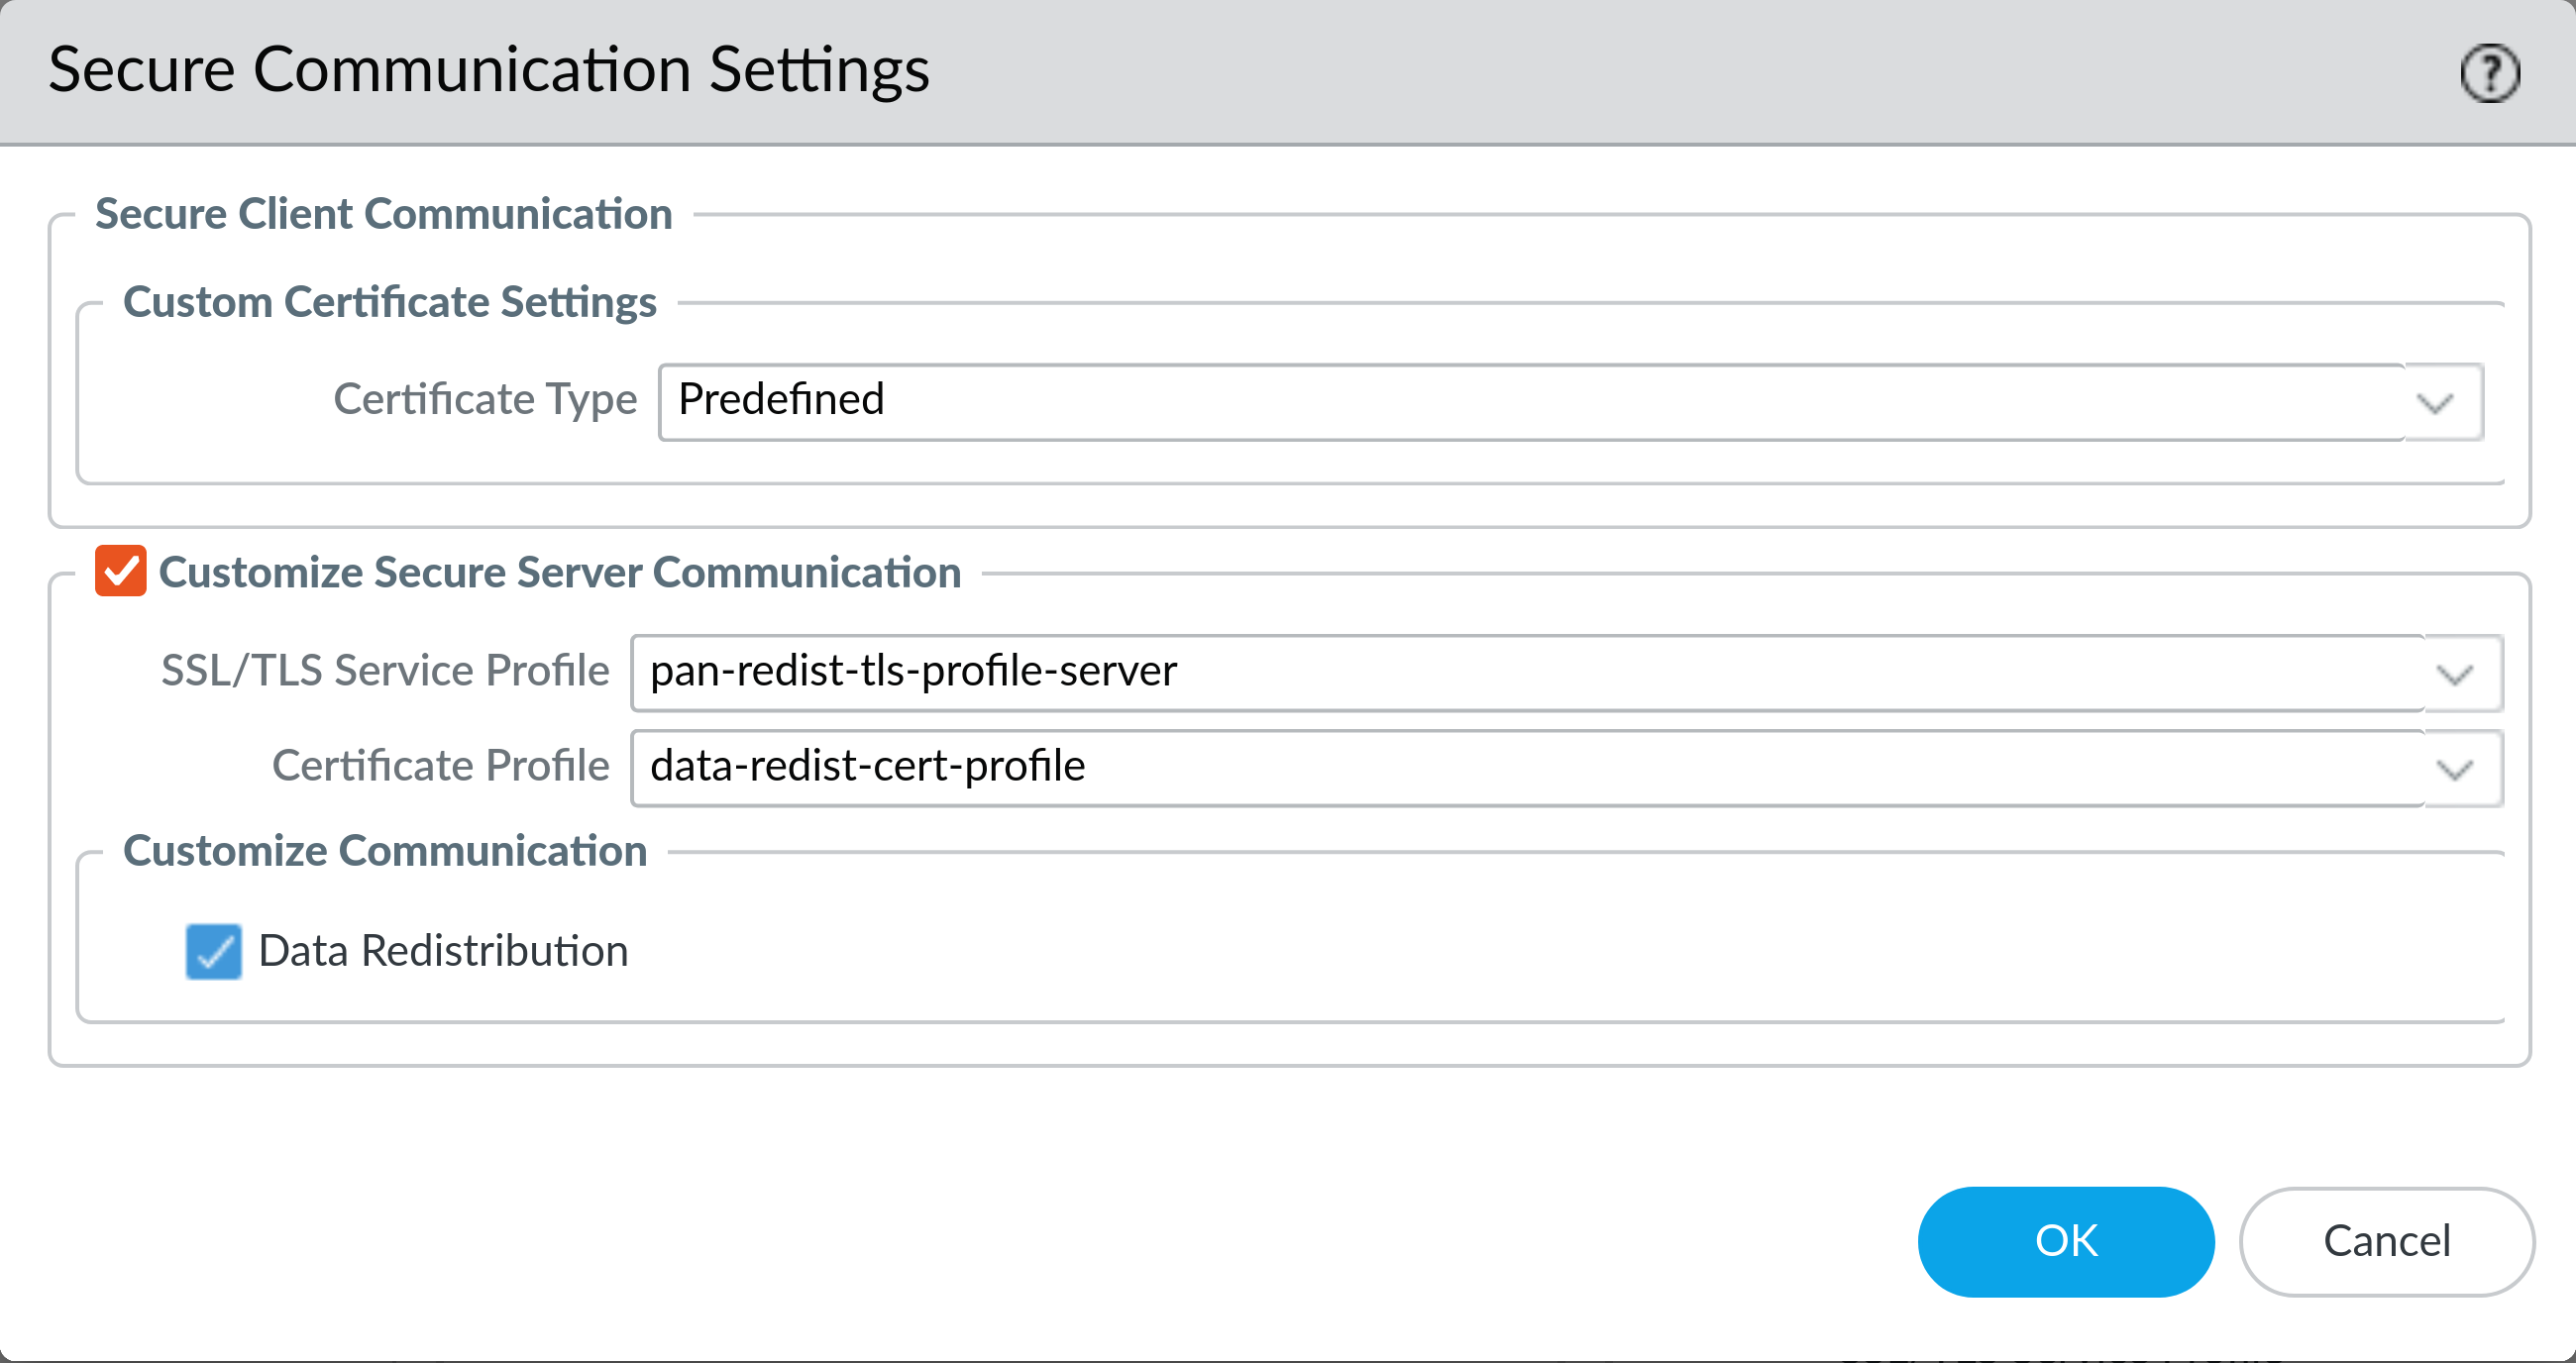
On Device > Setup > Management click the gear icon at the top right of the Secure Communication Settings section. Under Customize Secure Server Communication select the SSL/TLS service profile you created earlier from the SSL/TLS Service Profile dropdown.
Then select the appropriate Certificate Profile that you created earlier. Check the box for Data Redistribution and click OK to save the settings.
6: Commit the configuration changes (Client and Server)
Warning: Once you commit these changes the devices will begin to use the new certificates. If you have not installed the new certificates on all your devices you may cause an outage. Redistributed User-ID entries should be cached, so quickly committing on both the client and the server should cause User-ID latency, but not an outage.
Commit the configuration changes to the device. If you are using Panorama you will need to push the changes to the devices.
Addendum: Checking a Data Redistribution Servers Certificate
If you have have openssl installed (typically installed by default on most Linux distros and OSX) you can check the expiration date of the Data Redistribution server certificate with the following command:
openssl s_client -showcerts -connect firewall.example.com:5007 2>&1 | grep NotAfter
Note that we’ve redirected STDERR to STDOUT with 2>&1 to keep the output clean. Replace firewall.example.com with the hostname or IP address of your firewall.
This should produce output similar to the following:
v:NotBefore: Feb 1 07:30:33 2023 GMT; NotAfter: Jan 1 07:30:33 2032 GMT
Here we can see that the certificate in use on this data redistribution server doesn’t expire until 2032, so it is not affected by issue #2.
]]>
